Keep all your shoot days in one schedule instead of separate files.
Dayframe keeps every day of a multi-day shoot in a single project. All days are accessible from one place, shareable with one link, and managed without duplicate files.
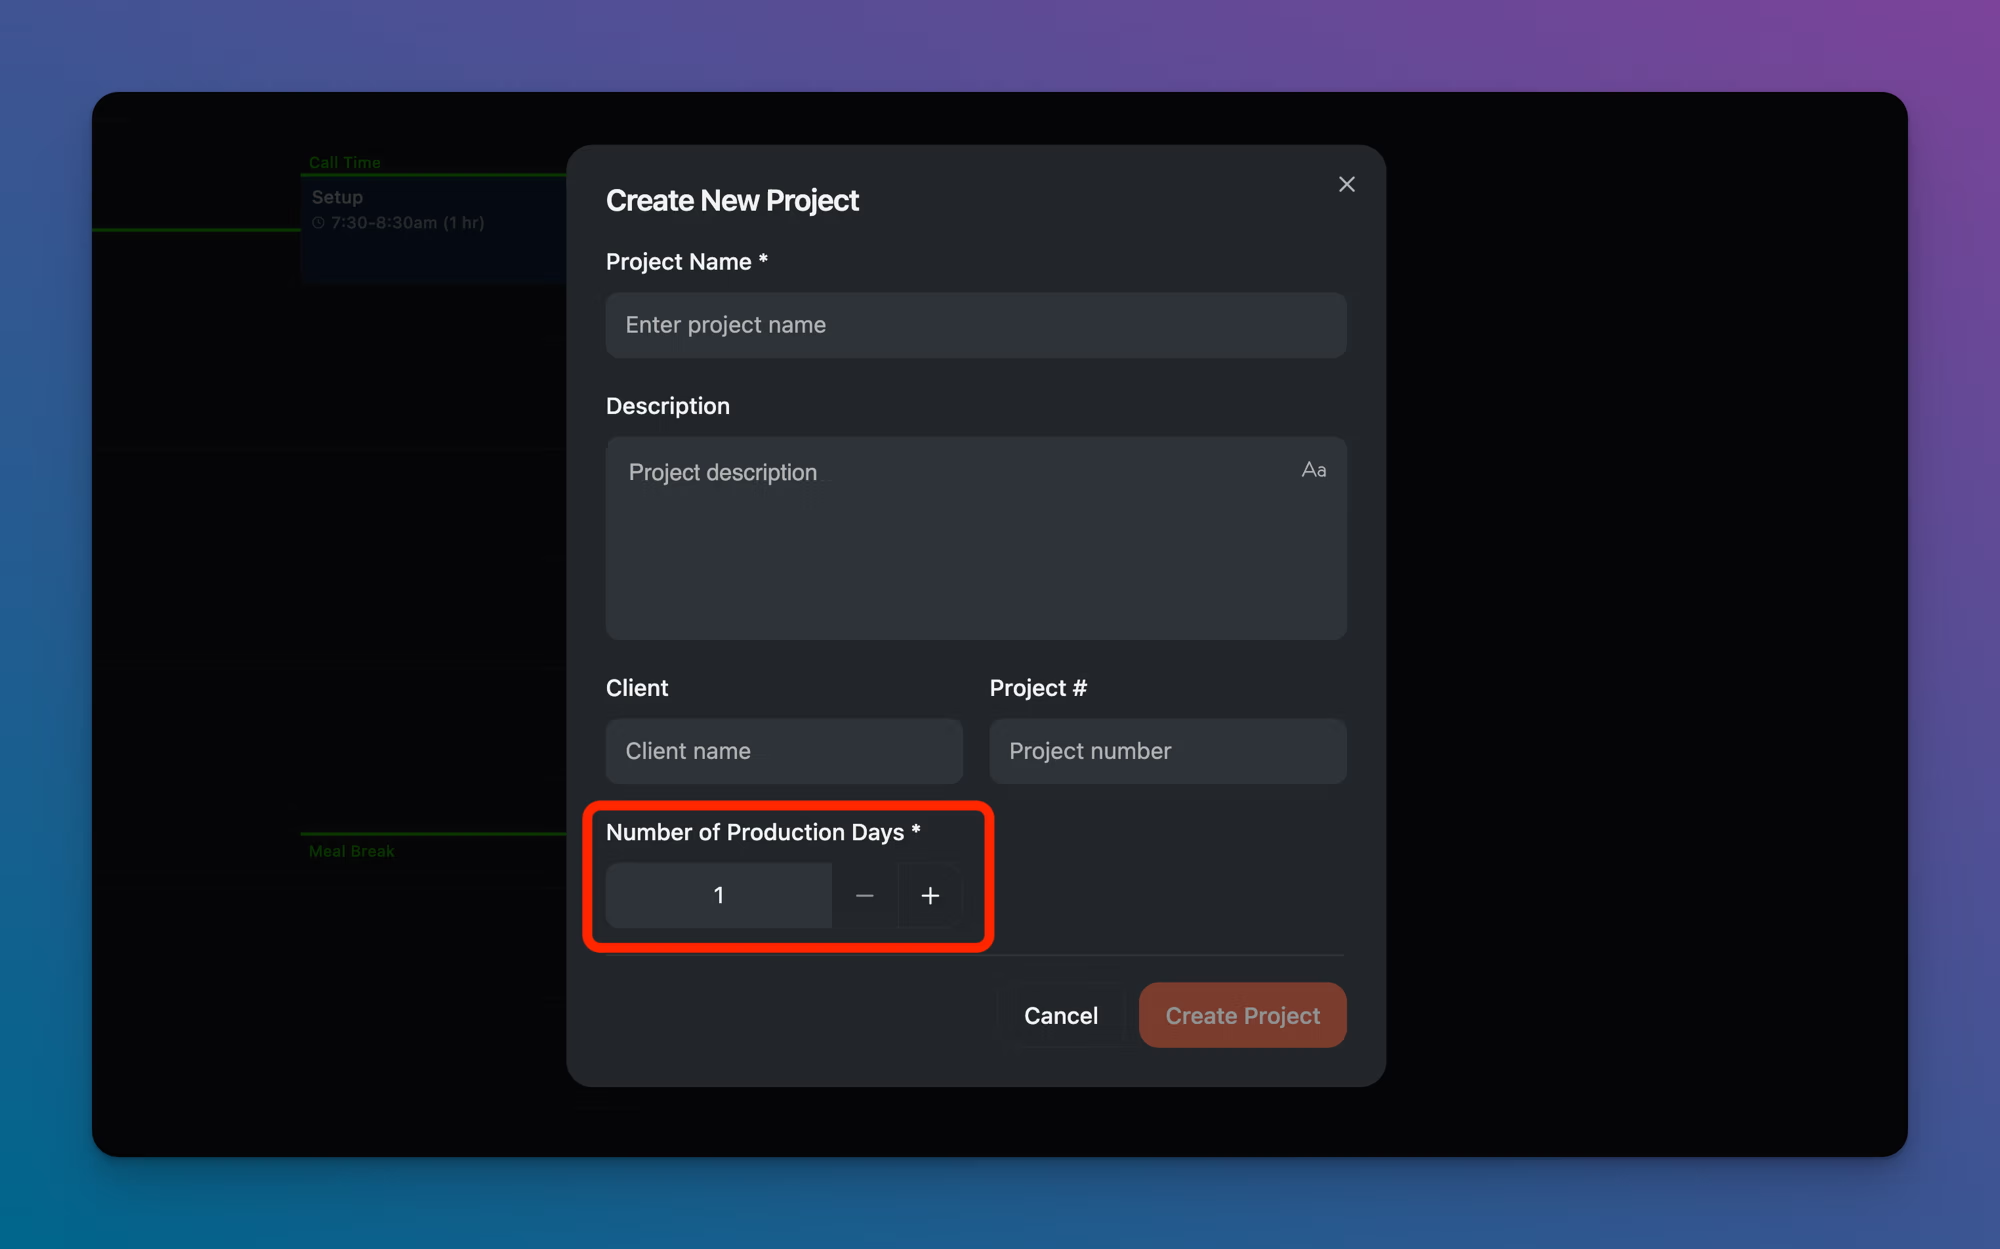
Setting the number of days when creating a project
Click + New Project in the sidebar.
In the Number of Production Days field, use the + and − buttons to set how many shoot days the project covers.
Click Create Project.
Adding days to an existing project
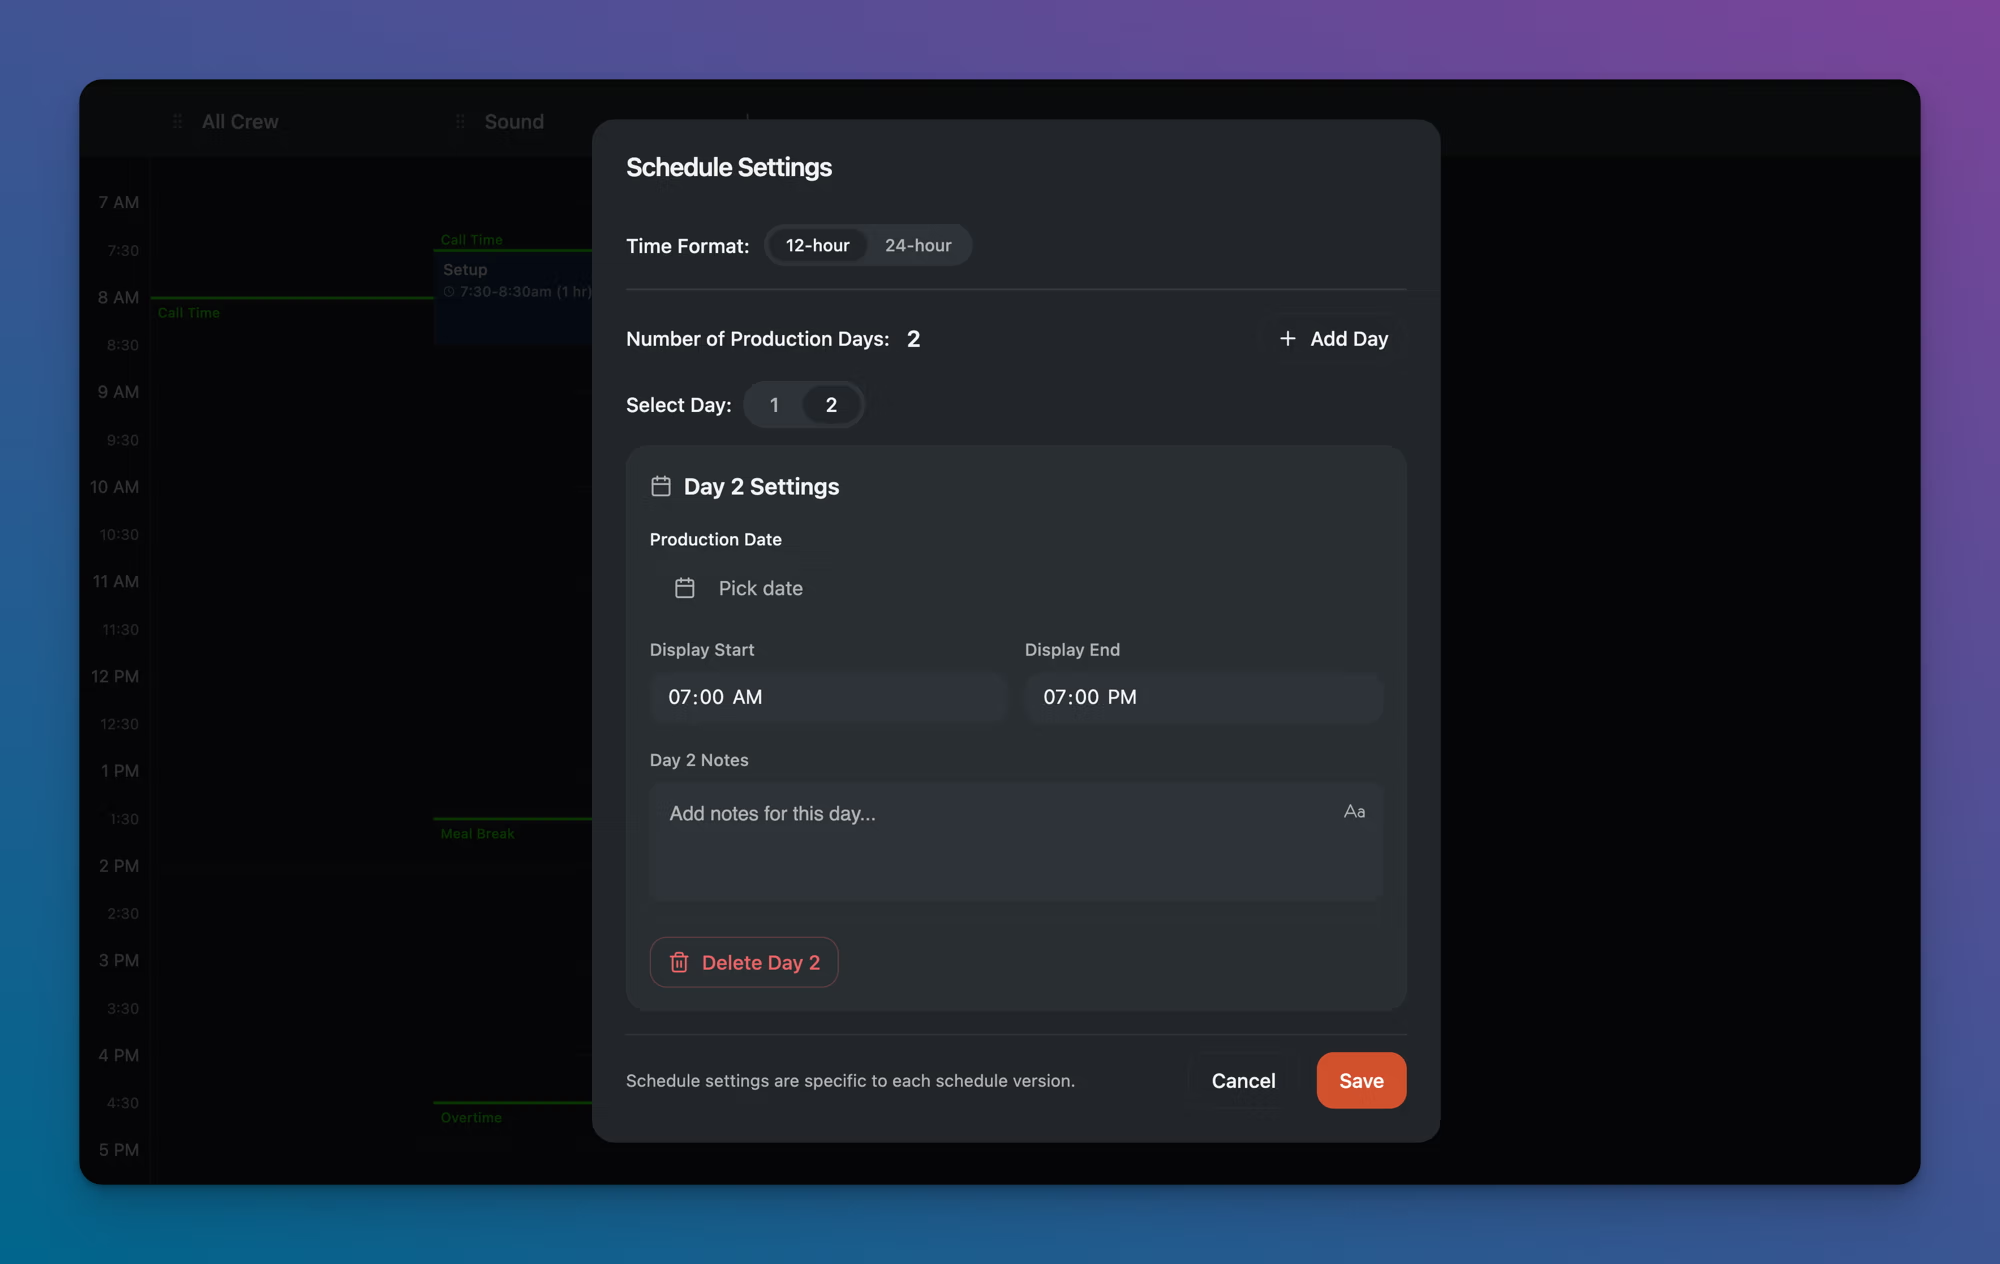
Click the Schedule Settings icon in the toolbar (the gear icon on the far right).
In the Schedule Settings modal, click + Add Day next to the Number of Production Days.
A new day section appears. Set its Production Date, Display Start and Display End times, and Day Notes (like the shoot location).
Click Save.
Configuring each day
Each day has its own settings:
Production Date — the calendar date for that shoot day.
Display Start / Display End — the time range shown on the timeline for that day. Set these to match your crew call and expected wrap time, or add some extra room on either end for visibility.
Day Notes — a text field for day-level information like the location address, parking instructions, or weather notes. This appears in the schedule header and the PDF export.
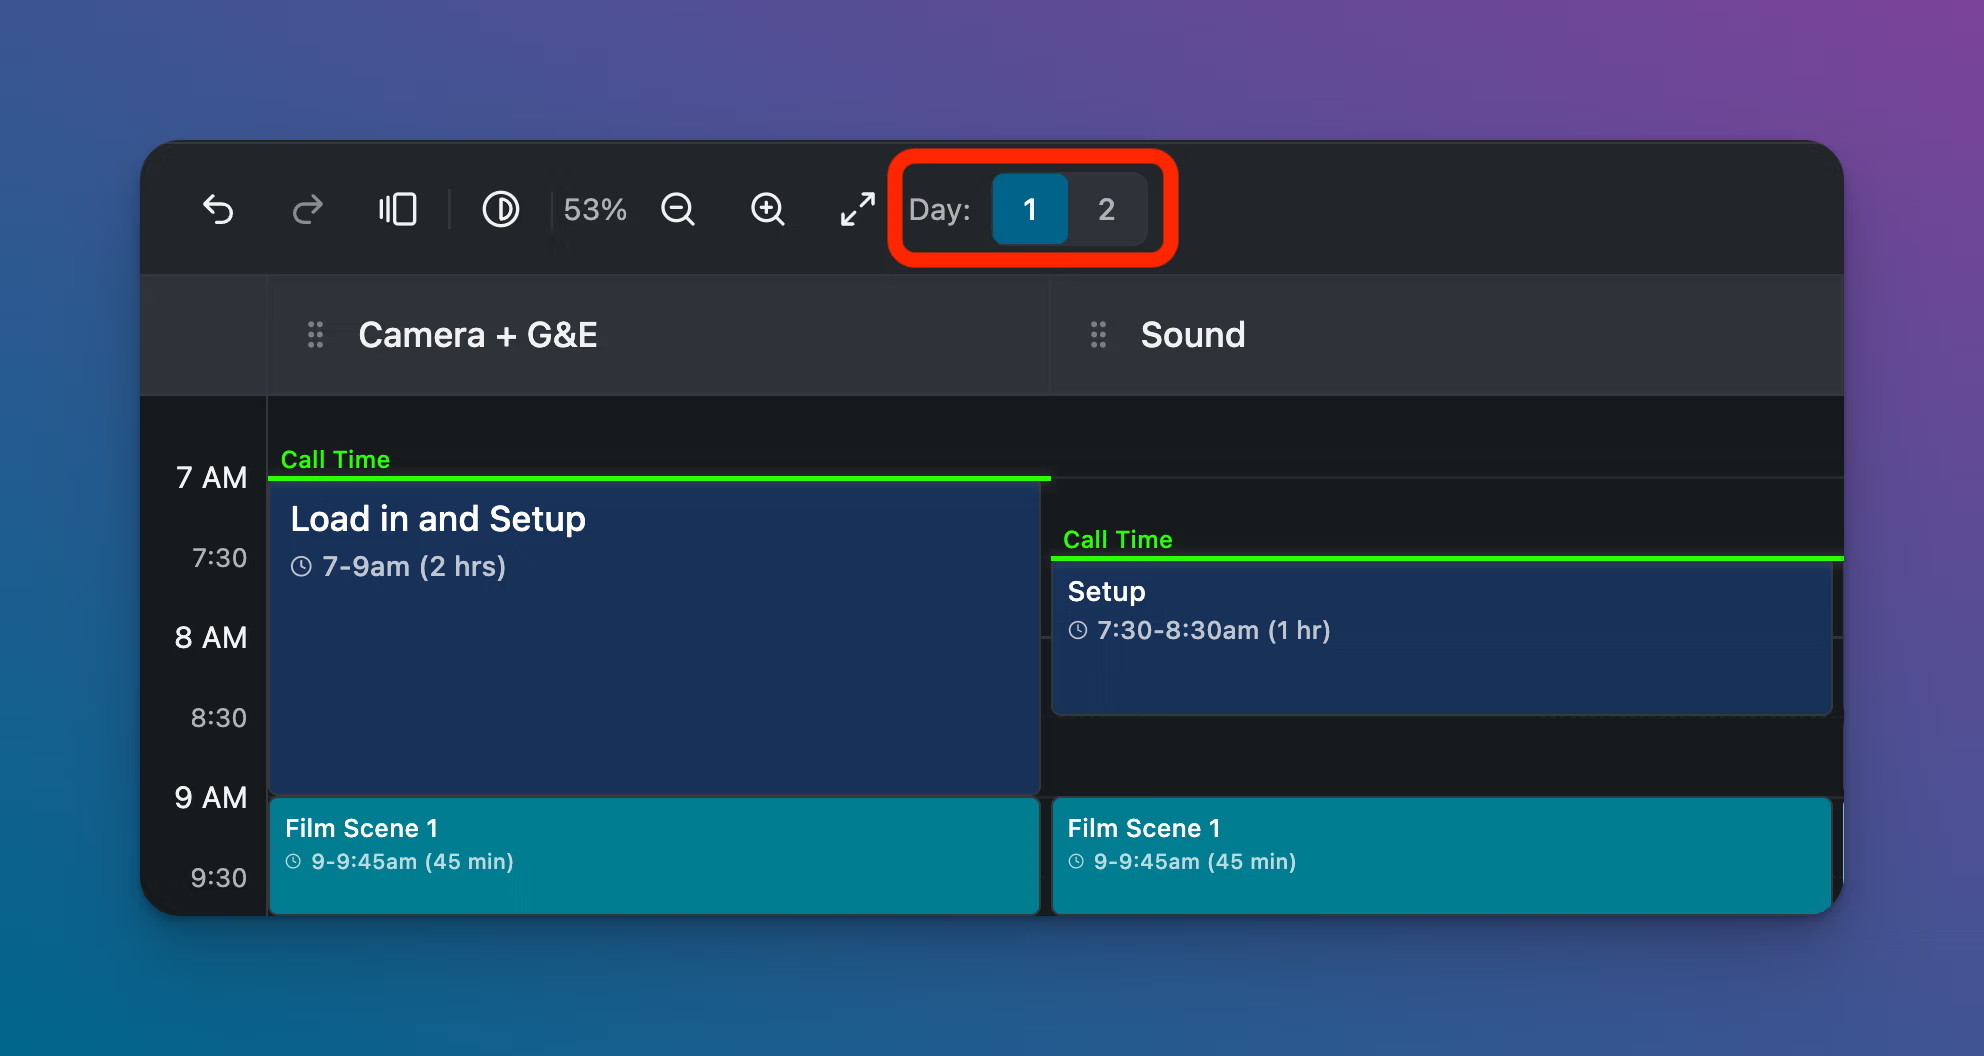
Switching between days
Use the Day selector in the toolbar to jump between shoot days. Each day is numbered, and the currently active day is highlighted.
Tips
Set your Display Start about 30 minutes before crew call and your Display End about an hour after expected wrap. This gives you visual breathing room on the timeline.
Use the Day Notes field for the location address. It shows up in the schedule header, so your crew can see it without scrolling.