Create blocks, set durations, add labels, and adjust times.
Time blocks are the core building element of every Dayframe schedule. Each block represents a chunk of your shoot day: a scene, a setup, a meal break, a transition, or anything else that takes time.
Adding a new block
Click on an empty area of the timeline within the lane where you want the block.
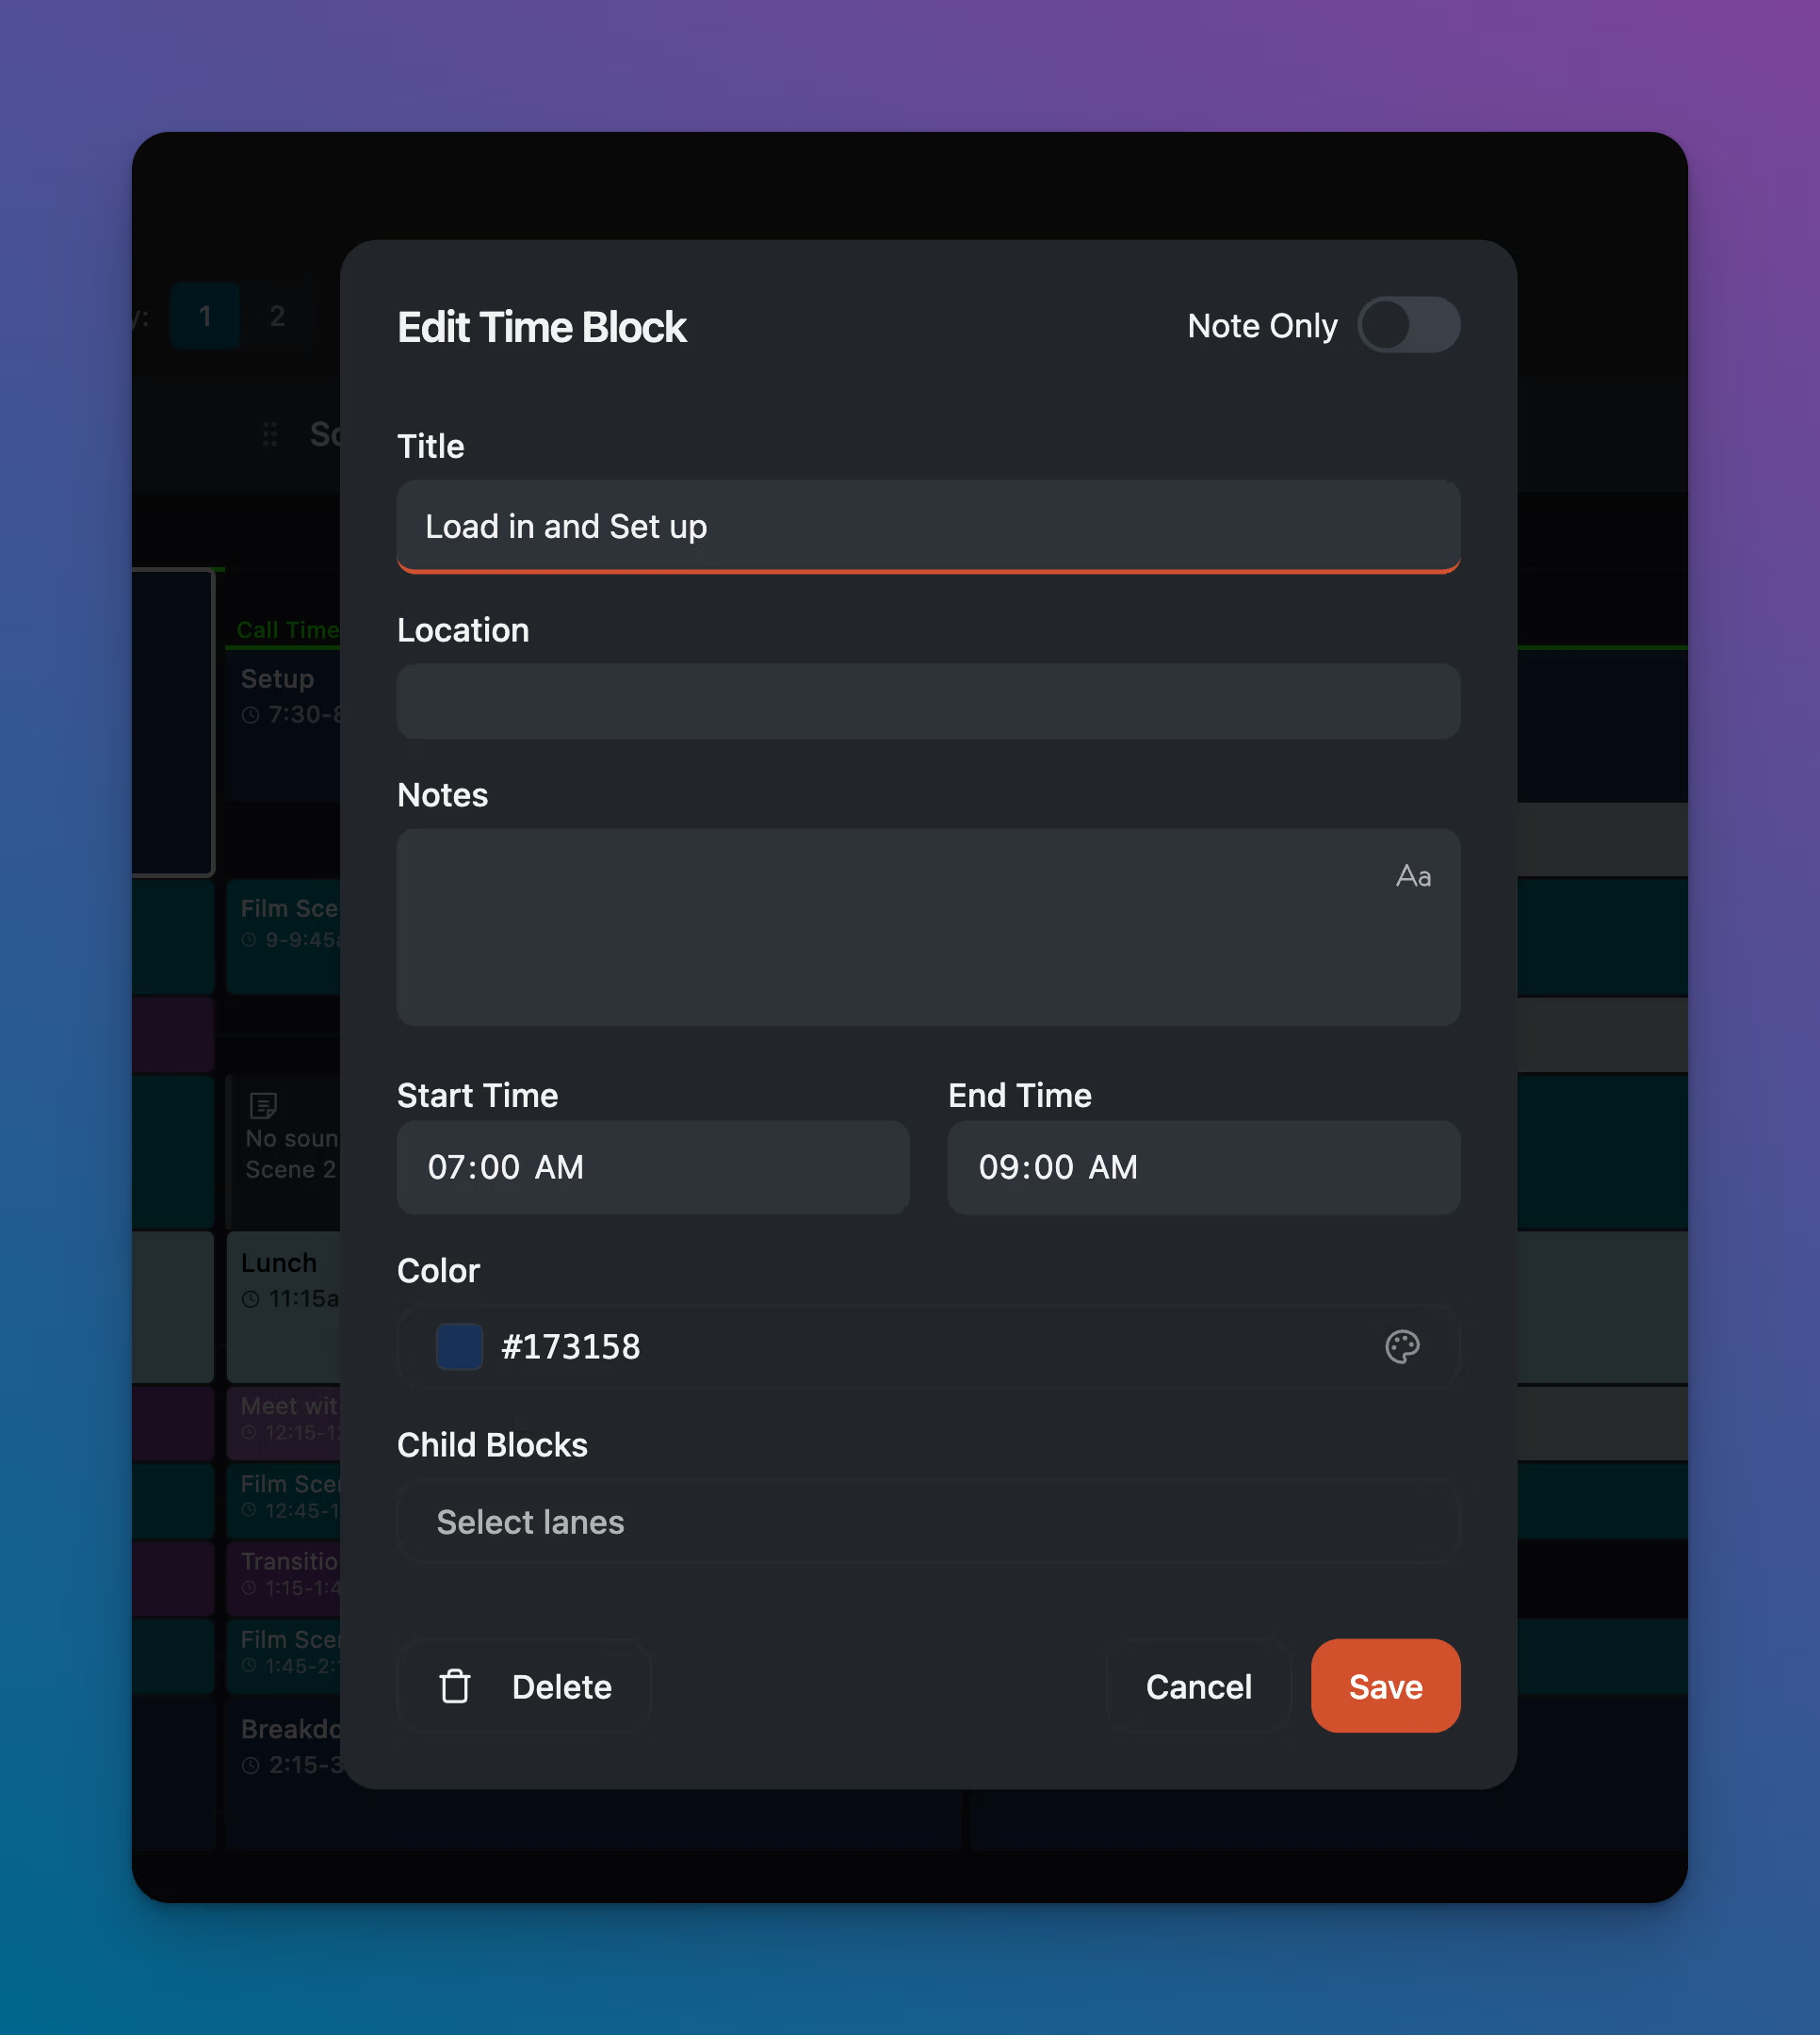
The Edit Time Block modal appears. Fill in the details:
Title — the name of the block (e.g., "Film Scene 1" or "Lunch").
Location(optional) — where this activity takes place. Displays on the block and in the PDF export.
Notes(optional) — additional details like crew instructions, gear notes, or setup reminders. Click the Aa icon to format the text.
Start Time / End Time — the time range for the block. The duration calculates automatically.
Color — pick a color to visually group related blocks. Click the color swatch to open the picker or enter a hex code directly.
Child Blocks — optionally link this block to other lanes. Covered in detail in Using Parent/Child Blocks.
Click Save.
Editing an existing block
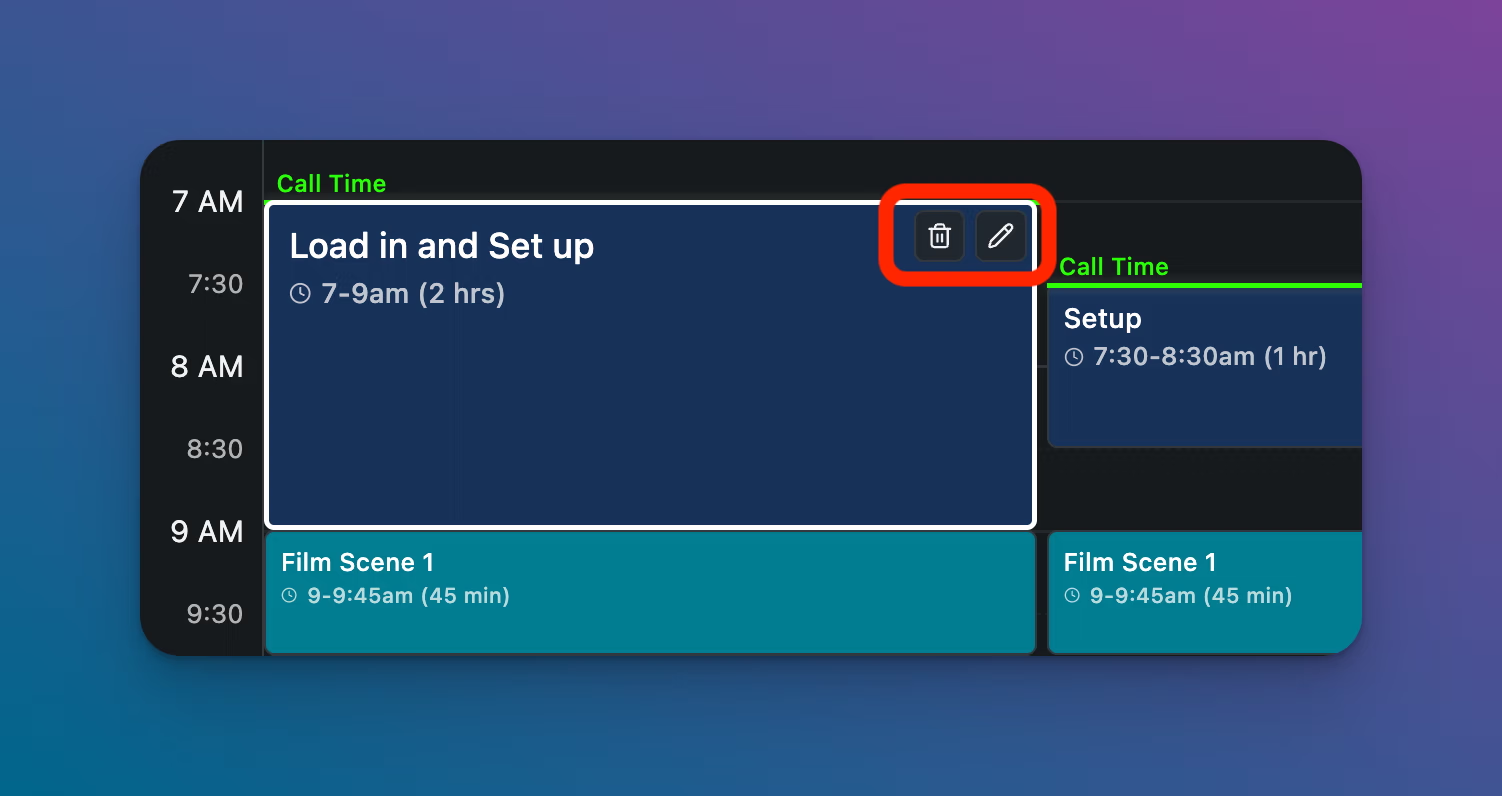
Hover over the block you want to edit. A pencil icon and trash icon appear in the top-right corner.
Click the pencil icon to open the Edit Time Block modal.
Make your changes and click Save.
Note Only blocks
Toggle Note Only in the top-right corner of the Edit Time Block modal to create a visual annotation instead of a timed block. Note Only blocks:
Do not display a time range
Do not have a Location field
Do not support child blocks
Do not require a title
Use them for context that isn't a timed activity, like "No sound - Scene 2 is MOS" or reminders for the crew.
Tips
Color-code by type: one color for scenes, another for transitions, another for meals. It makes the schedule scannable at a glance.
The Notes field supports formatted text. Use it for details your crew needs on set, like "Bring left-handed gaff tape" or "Buffer before Caleb's hard out at 4pm."